Showing posts with label pillow. Show all posts

Thursday, July 12, 2012

finish-a-long part 3...

Isn't he darling - a sewing machine's best friend! He is the newest addition to my steadily growing pincushion obsession. My FLiPS partner Kristen was reading my mind - he came with a box full of goodies, including another pinnie [or rather, pin sharpener as it was filled with sand]. Probably one of the best swaps I have ever been in. Though, I have been one lucky crafter as far as swaps go! It has been great playing along with Rhonda's Finish-A-Long! It's officially the third quarter and I wanted to share with you the creations I will [fingers crossed!] be finishing this time around.

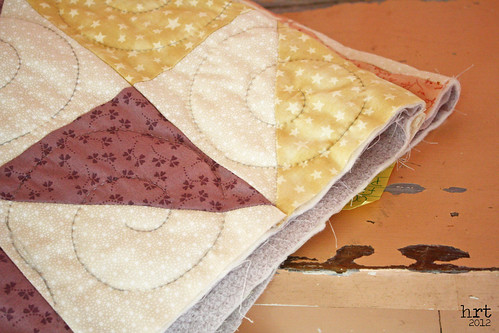
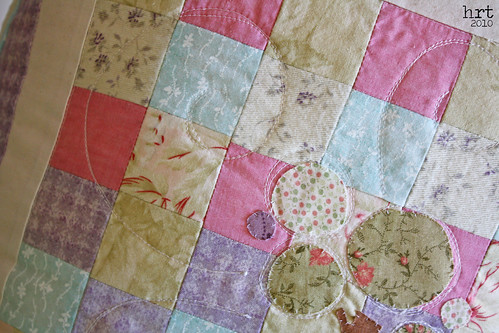
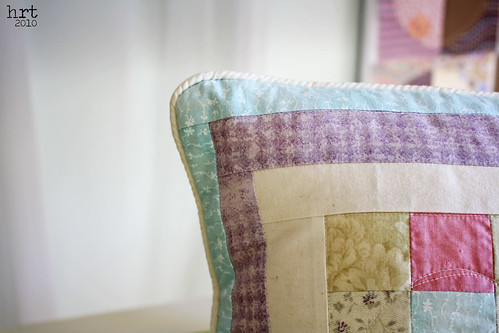
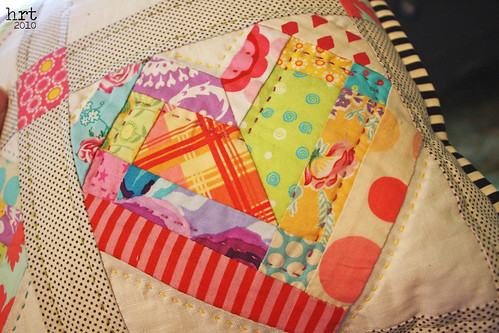
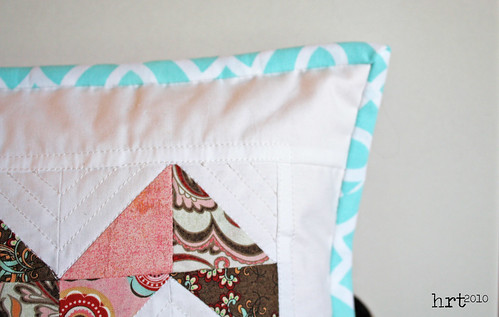
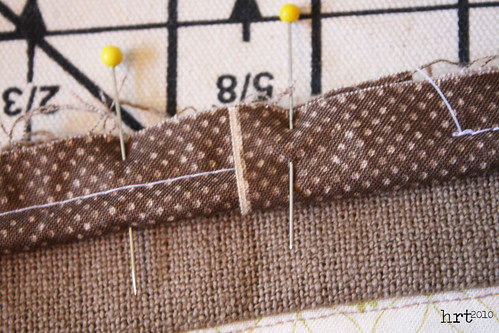
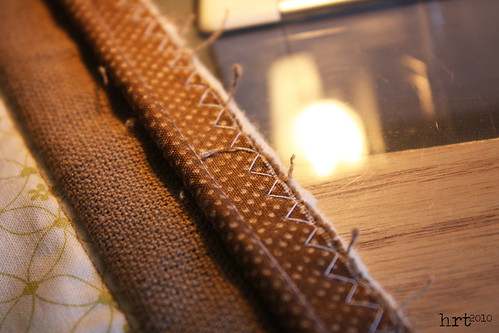
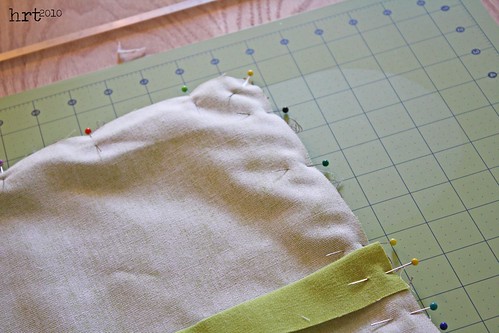
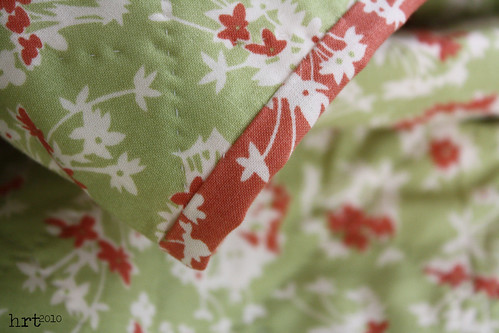
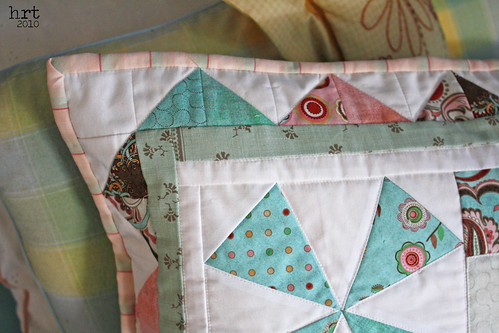
1. Another quilt needs binding!! I can't wait to share more of this Kaffe Fassett pattern very soon, the next time you see it, it will have the binding and hanging sleeve attached. This will be in our forever-being-rennovated kitchen :) I have the perfect spot to hang it up!

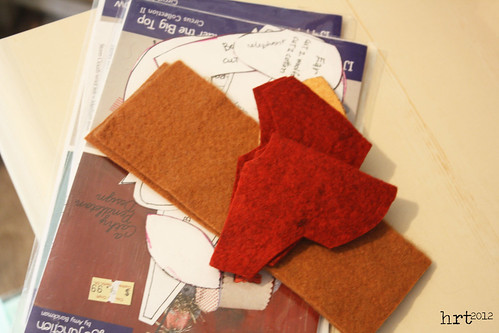
2. The final installment in my little venture into the circus world is all cut out. The lion ringmaster needs stitched together and embellished. He will have to keep the unicorn, mouse, seal, monkey, and elephant in line :)

3. I have two funky pincushions that have been sitting on my sewing table for too long. All I can say is, be careful, pinterest inspiration can strike at any time.

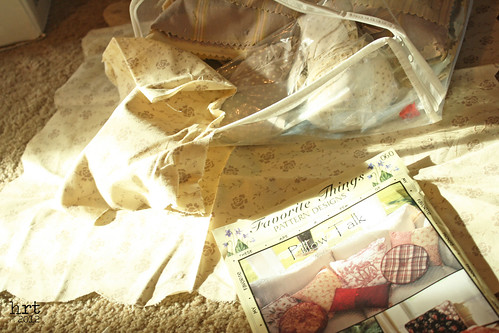
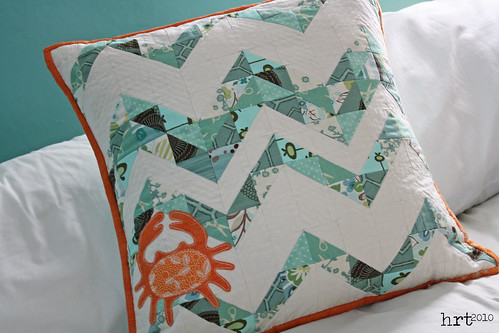
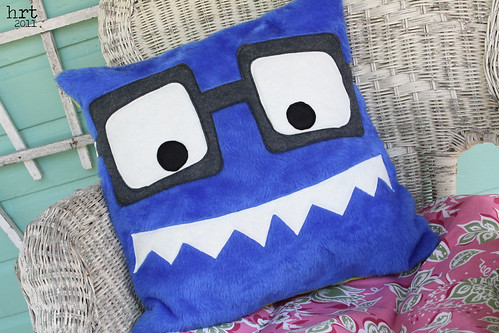
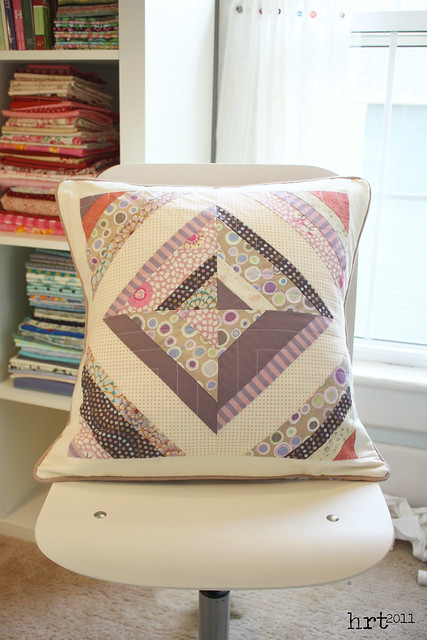
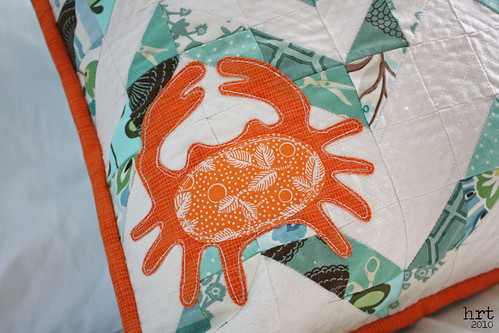
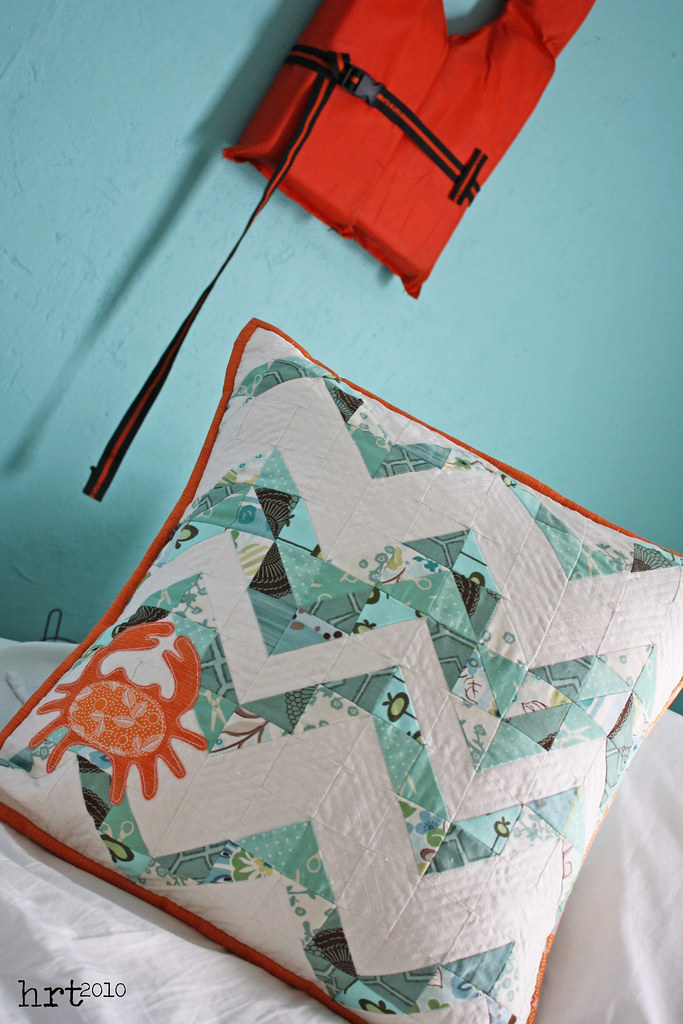
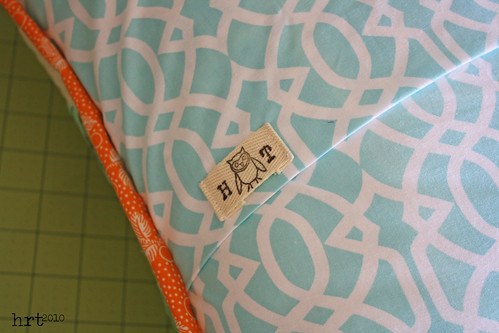
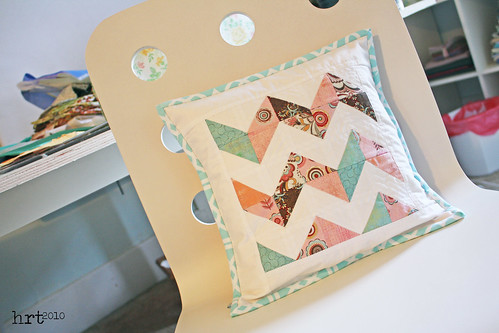
4. Finally, last quarter I finished The Flock. This quarter I am hoping to whip up some of the coordinating pillows and pillowcases. Feels good to finally be using the fabric and pattern I bought so long ago for their intended purpose.

Now all that's left is to get down to the business of sewing! The weather is cooperating for a little craftiness, it has cooled off this week. Last week it was 104F outside with no air conditioning inside - the thought of sitting in my upstairs craft room made me break a sweat :)

Monday, April 2, 2012

giveaway winner + shop news...

In the last two weeks...
- I've been sick... CHECK
- I've had technology issues... CHECK
- I've had more work than 24 hours could hold... CHECK
- I've had some personal challenges to work through... CHECK
- I've been waiting for the promised delivery of the book I am in... CHECK
- My sewing machine needed serviced... CHECK
- Life has made me too tired to look at editing pictures and writing up posts... CHECK

Now that we are finished with the excuse portion of this post, now on to the apology section. I am so sorry that I have been a poor blogger! I ask your forgiveness for not posting a giveaway winner as I promised. To shed some light on my absenteeism, crafting and blogging are part of a very slim category in my life known as 'hobbies.' Crafting is a stress reliever, not work, something I like to do, just for me - I try not to step into the treacherous territory of 'having' to sew or blog. I really enjoy sewing and blogging, and I would like to keep on 'liking' them :)

Anyways... onto the WINNER!! The proud new owner of a copy of Seaside Home is [drumroll please] Susan! [special thanks to the random number generator!] Please email me your mailing information, and I will throw in a little something along with the book since you were forced to wait on this announcement. Thanks to all who read my blog and entered! If you didn't win, the book is available NOW in my etsy shop :)

Also, as pennance, if you use the code SUMMERFUN you can get 25% off any pillow in my shop. Hope to blog with you all again very soon!

Thursday, March 1, 2012

exciting news + a giveaway!

I am pretty darn pleased to announce that my little crabby pillow has made its way into a book!! The soon to be released book Seaside Home will contain one of my very own original patterns. I can't hardly believe it :D

Did you see my crabby cover girl in the upper left hand corner? Here is a bigger picture I took in case you missed it.

There are so many wonderful sea-inspired projects - don't you love that little beach house?! To roll out the red fabric for the book, I would love to giveaway a copy of the book. Just leave me a comment on this post to enter. There is also a blog tour in the planning stages. More details to follow; I will draw a winner on March 14.

Friday, September 2, 2011

aaahh! not real monsters...

* no monsters were harmed in the making of these pillows :)
Following my last post, I am fairly certain my grandma never made any monster pillows.

I came up with these guys on my own - using the faux fur as inspiration. I can't figure out which one I like best - though the one with glasses bares a striking resemblance to my husband :)

I'm calling these guys book buddies [at least that's the name I have arrived at for now]. Great for old and young alike, the pocket in the back is the perfect stash for a newspaper, crafty inspiration book, or a favorite Little Golden Book. They are up for grabs in my etsy.

Thursday, March 17, 2011

hemisphere pillows...

Though quilting hasn't even started, these pillows are ready to match the hemispheres quilt that I finished a few months ago. The plan is to use this quilt to freshen up the living room, and the pillows will be the finishing touch. It is always a struggle to figure out what to do with all of the leftover bits and bobs from a project - scraps, extra blocks, additional yardage. There is always a part of me that wants to keep all of these together, I'm not sure why, suppose it is 'just in case' I need to make something else to match. This is why I especially like to use as many of those extras up, and these pillows did just that.

My first crack at string blocks was last year in the Block Swap 2. The technique is super simple using a paper pieced method. I enjoyed playing around with machine quilting on these blocks. It's so neat how you get unintended patterns when you quilt - in my head I only saw the quarter square corners and not the overall cross pattern that appears.

Leftover circles made this pillow a snap to put together. This is my first attempt with a darning foot - I am not sure that it is perfection, but it really wasn't as scary as I thought! Practice will make perfect I'm sure. I actually made two of these, the other one is up in my etsy shop if you love it too ;)

The backing finishes off the remaining stash of my fave fabric from the hemisphere quilt. Sad to see it go, but glad I was able to use it in a larger piece. The piping [and other half of the backing] is a cotton linen that I had and happened to coordinate PERFECTLY! I have enough of this fabric to bind my quilt with - yay for using what I have!

I'm excited to see a little bit of blue appearing in the sky, though something about this weather and time change has given me the worst headache :( Perhaps some crafting and netflix will be the cure!

Saturday, November 20, 2010

of benedryl & pillows...

Oh the agony of sick days... If I were to be forced to take nearly a week off of life, I would have preferred to be able to function! I mean how much fun is a week off where you can't manage to even sew?! [I think missing my sewing machine may even have made me sicker] But I am back in action [mostly]. I wanted to show you the latest addition to my pillow obsession. Meet the crabby pillow!

Inspired by the Caribbean. We have many grand adventures while cruising, some more comical than others. At one of the beaches, they had these collapsible 'tents' for shade. So we picked one up and when we did the tiniest, and daintiest of crabs wandered out. Surely, as a lover of nature and crabs, I lept for joy and scooched in for a closer look.... umm no, I squealed fearing certain death if it came near.

This crabby pillow is much more cuddly. I am very proud of my original design. He was a time consuming little number. I made about a billion half square triangles to make up the zig-zag wave. It was lots of fun to use up a bunch of scraps: Summer in the City, Amy Butler, Flights of Fancy, and MoMo coupled with kona in bone. Then the million lines of zig-zag quilting :)

I was disappointed to have to miss out on this round of the Pillow Talk Swap... Just too many other life commitments this time of year. But if my crabby pillow has peaked your interest, and you are looking for more pillows - check out the flickr group!

Wednesday, October 13, 2010

another one bites the dust...

It's official - I completed another unfinished object [ufo]! Last year I set off on a mission, a brave mission to root through my box of half-finished projects and work on those before starting any new projects.

Happily this lasted for a while until I remembered why I had thrown these projects to the side originally - no longer my taste, ran out of fabric, too tedious, or just plain bored... Perhaps, [and these are the words of a fabric/craft addict for sure] it isn't my fault - it is the blogs, magazines, fabric designers, etc. who flood my world with way too many exciting and inticing projects that I just CAN'T pass up! I press on, though, using the box of neglected and rejected craftiness as my 'go to projects' whenever I need to grab a quick take along craft. But today, today is a good day - this post is about a finish after all :D

Judging by my fabric choices, I put the checkerboards and appliques together about 4 years ago. I pulled them from the ufo abyss, added borders, quilting, backing, and piping... et voila, lovely little pillows [I actually made 2 of them, so yes pillowS].

They turned out well, and I am surprised to see so many elements that are me now as a crafter: little checkerboard, somewhat bright colors, modern tree design. My house is beginning to overflow with pillows, so this little number is in my etsy. [I think my new motto is: a chicken in every pot and a pillow on every chair. Thanks HH :D]

Monday, October 11, 2010

pinnie & pillow love...

Before the great flickr incident of 2010 [where I accidentally deleted all my flickr photos], I had plans to show you the phenom pillow that I got in the Pillow Talk Swap! So without further ado, here it is:

This pillow was made by the wonderful Louise [she has a primo blog: lululollylegs], she also included some of her own patterns - I am so excited to give them a whirl! The colors are so bright and clear and really stand out on the black and white background. I just l-o-v-e it!

Another round of the Scrappy Pincushion swap has also come to a close, and check out the goods! I am super impressed with Michelle's crochet abilities and the blues and greens are just perfect! Swaps are so fun - I think what I enjoy most is getting in touch with people from across the country and the world! Makes our online community seem a little closer when you get a package in the mail.

Well, back to it - Mondays are super busy days around here, plus I am keeping an extra watchful eye on our little pooch who stole a box of raisins from the trash last night...

Saturday, September 18, 2010

pillow basics: three...

If you've just tuned in, I have been laying out a few ground rules for making fab pillows and cushions in the Pillow Basics Series. Today will be the final installment [Hurrah!]. I typically finish my pillows with either piping or a traditional quilt binding.

If you are binding your pillow...
Take your 2.5" strips and press it in half so that you have a long 1.25" strip. Layer your pillow with wrong sides together and the binding on top of the front. Sew the strip around the edge of the pillow using a 1/4" seam allowance. [Here is a great tutorial for mitered corners] flip the folded edge of the binding over to the back of the pillow and handstitch in place - yes, handstitching does take a while, but you have a very pro looking end result!

If you want to use piping...
First we are going to make our own piping using the 1.5" strips you cut. I generally use 3/8" cording from JoAnns, but you can choose the thickness you like best. Lay the cording in the center of your fabric strip.

Fold the strip in half around the cording, pin.

I have an ab-fab foot that is made for sewing piping - it has a groove in the center that holds the cording in place. You can make piping this way with a zipper foot as well. I like to set the needle position to as far right as it will go and the stitch length as long as it will go. Begin stitching 1" from the 'start end' [rember when we talked about the selvage in lesson two?]; stitch.


Pin the cording in place along the edge of the top of the pillow. Ease the corners by snipping into the piping. Tuck the end under the 'start end'

Using a wide zig-zag stitch [with the regular sewing foot], sew along the edge of the piping to secure it into place.

Layer the pillow back over the pillow front with right sides together, pin. With the zipper or cording foot attached, move the needle position all the way to the right and then move it back to the left one click. [This will ensure that none of those basting stitches show on your finished pillow] Stitch tightly along the edge of the piping. If you are using a thick fabric for your piping, you may want to switch to a denim needle in this step.

Trim the corners, rounding them to match the piping. Turn. VOILA! You're pillow is finished and ready to spice up your sofa!

This wonky star pillow is up for a new home in my shop!
THERE'S STILL TIME! Don't forget to sign up for the pillow giveaway!! Comment on this post...
ps: If you are enjoying these tutorials, feel free to add my button to your blog :]

Friday, September 10, 2010

the long lost giveaway...

Don't pass out... the giveaway that I have been telling you about for months now is FINALLY here! What else would I give away on my blog but my current obsession?! Up for grabs is a handmade [of course] pillow.

I used Blush [Basic Gray for Moda] to make a bunch of half square triangles and then set them out in a zig-zag pattern. The pillow is machine quilted for extra durability and has an envelope style back [complete with a handmade pillow form!]. It measures approximately 12.5" square, the perfect size for the back of a chair or front row on your bed! I drew inspiration for this pillow from some previous projects - my snow trails pillow and my pillow talk swap pillow.

Here's the deal:
* Leave a comment [1 entry]
* Become a follower, leave another comment that says that you are following me [1 entry]
* Blog about my giveaway, leave another comment with your blog address [4 entries]

Sweet and simple! I will draw a winner next Saturday, September 18th...

Thursday, September 2, 2010

ties that bind...

This handy little potholder is just one of the many things I have been binding lately! This was a fun little foray into the world of potholders [I have been seeing them everywhere and had to try my hand at it]. The main panel is a piece of osnaburg that I drew on with a pigma pen, colored with crayons, and then heat set. This has been hanging around the UFO bin for no less than 7 years [yikes!] I actually liked working with the InsulBright batting - I am always a little scared to sew through something that appears to contain metal, but the needle cruised through it! I backed it with a scrap of Arcadia and added a handy little hanger on to the back. [Does anyone how to make the binding loops like on the store bought potholders?]


So lots of binding going on around here - which means lots of finished projects to show you soon! And I haven't forgotten about my promised giveaway - it will be a handmade little number and it is ready for finishing as well!

Thursday, June 24, 2010

pillow talk swap...

If you have been following along for a little while, you know that I have been overcome by pillow fever. They are just such quick projects for the wow factor that they provide. Plus they have given me the chance to practice my machine quilting [still nowhere near ready to take on a full size quilt]. I joined the Pillow Talk Swap in round 3, which is currently wrapping up. [WHAT?! you haven't checked out the beauties in that swap? You need to click on over there right now... well finish readin' this post first maybe :]

I didn't realize how much of a challenge this would be. The bar for quality and creativity in this swap is set very, very high. I went through no less than three pillows and zillions of design ideas, before I settled on this pillow. This isn't exactly like any of the pillows in my partners inspiration mosaic, but all of her/his faves seemed geometric and I think this fits the bill.

This block is a combination of different patterns: kaleidoscope [using my new ruler!], coin, and bunches of half square triangles. Fabric used is Blush by Basic Grey for Moda and a white Bella Solid - and a tiny bit of French General. The binding fabric is something from my stash, so I'm not exactly sure of the designer or line.

Hope s/he likes it - I'm super nervous!

Wednesday, June 23, 2010

pillow basics: two...

When we last left our pillow, we had basted and quilted our pillow front. A note on the size of your pillow front: for a really full pillow, add 1/2" to your pillow form size; for a more relaxed fit [I prefer this] add 1.5" to your pillow form size.

Now we are going to cut out the rest of the pillow. These instructions are for an envelope style back. I tend to use this method because: a) you can easily remove the pillow form for cleaning or when changing decor; b) it's fairly simple; c) no scratchy zipper.

From your backing fabric cut 2 rectangles. In this equation y = the measurement of one side your pillow [this is for a SQUARE pillow]. Measurement of each rectangle: y" by [(y/2) + 4]" For a rectangular pillow you will have two different side measurements, just plug these into the equation.

Fold one long edge of each rectangle over about 2" and press.

I will show you two methods for finishing the edges of the pillow.If you want to bind the edges like a quilt: cut 2.5" strips the width of the coordinating fabric. If you want to add piping/cording: cut 1.5" strips the width of the coordinating fabric. The amount of strips you will need is determined by the size of your pillow. To be safe I usually add up all of my sides [find the perimeter] and then add 10-12".

Look at the selvage edge of your strips. [A tightly woven edge that runs along both outermost edges of a fabric's lengthwise grain. Selvage edges keep the fabric from fraying.] Generally one of the ends will be printed like the rest of the material i.e. it won't have words or be a different color. If your fabric has fringy edges, carefully cut the fringe off. Using this method will lessen the bulk where your ends meet as you sew around your pillow. If the fabric you are using no longer has a selvage or both ends are printed, just fold one end under [WST] 1/2" and press. This is your 'start' end once we begin adding the binding or cording to the pillow.

Leave the 'start' end alone - go to the other short edge of your strip. Take another strip and lay it perpendicular over the other strip.

Sew at an angle from corner to the other. Trim off extra triangles. Press seam open. Repeat this step until you have one long strip. Using this method as opposed to sewing the strips end to end reduces the bulk.

ps: If you are enjoying these tutorials, feel free to add my button to your blog :]