Showing posts with label christmas. Show all posts

Monday, December 26, 2011

copy cat holiday...

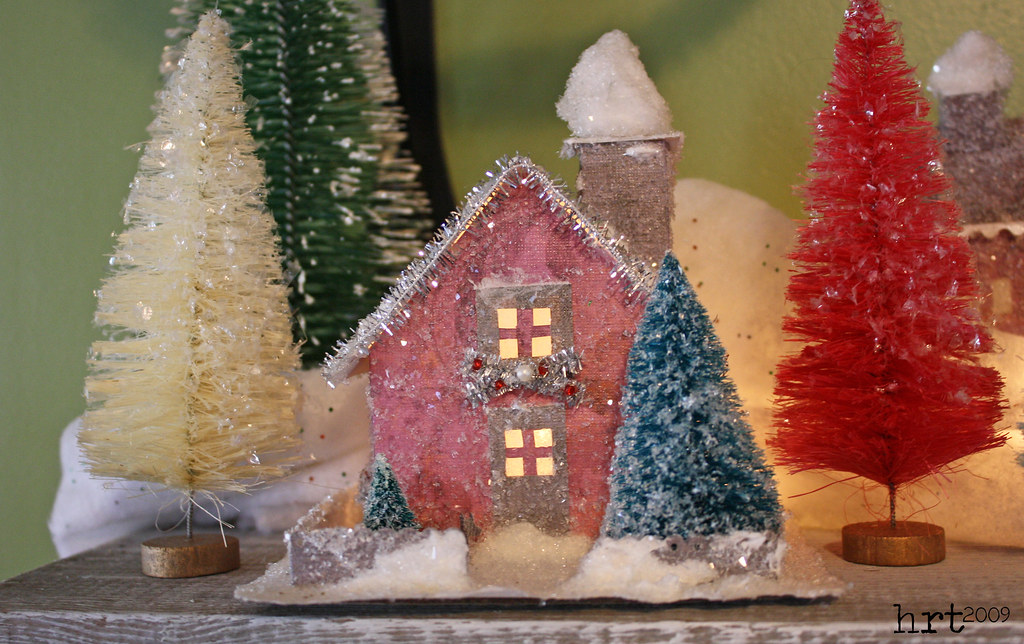
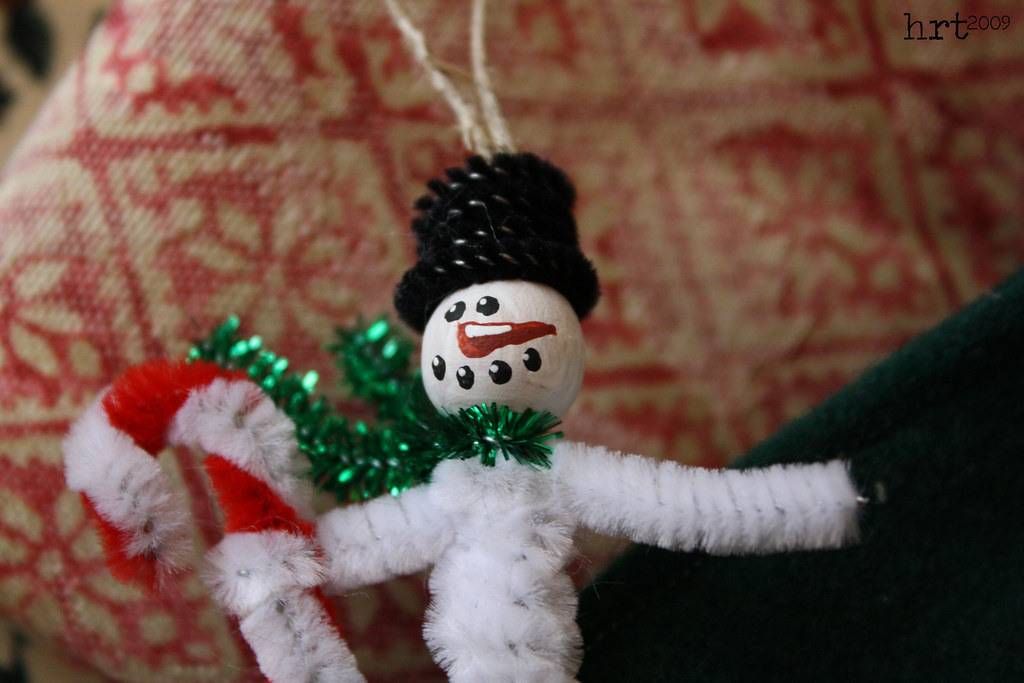
Imitation is the best form of flattery, right? I hope so. I fell in love with this beautiful wreath that Angela put together. Normally I am not into making exact replicas, but I liked the color choices, the positioning, and the types of flowers she used. I also got to experiment with some felt flower tutorials. Specifically, I used rolled, circle, and rose bud flowers. I am so thankful that she shared her project!

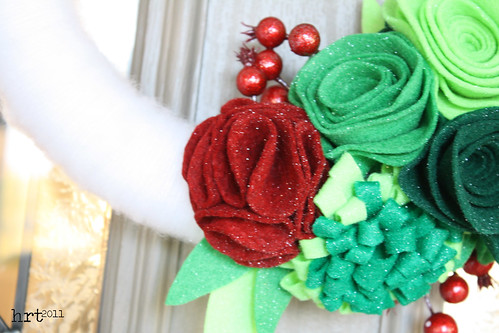
This was a wonderfully economical project - the yarn I used was some I found when we cleared out my grandma's farm before the auction, I had some of the felt, and of course I had spray glitter [how festive, don't you think? :] Normally I prefer 100% wool or wool felt, but all of the greens in this wreath are plain old regular craft felt. The bright colors are just not readily available in wool felt. Since this won't receive any washing and only light wear & tear, I am certain it will hold up.

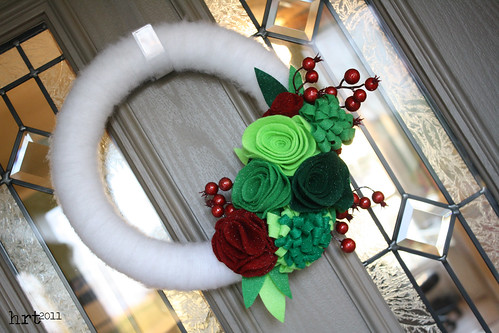
It is hanging on the door to our pantry in our kitchen. Though I had dreamed that it would find a home on our front door, the doors are too close together and the flowers ended up smooshed. [at least it is hanging on the front door for my pictures]

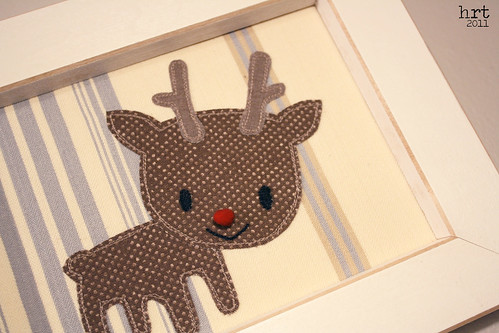
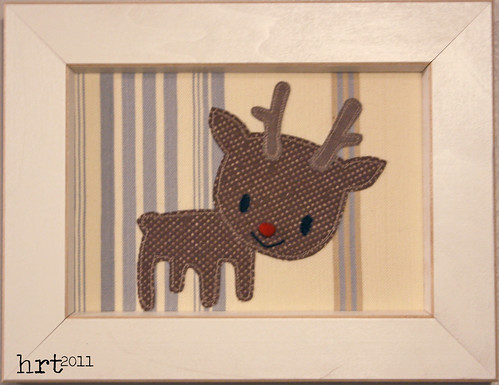
Here are a few of the crafty Christmas gifts that I actually finished. I made a few festive tea towels; this deer is a copy of one I did last Christmas, which was a take on a paperchase design.

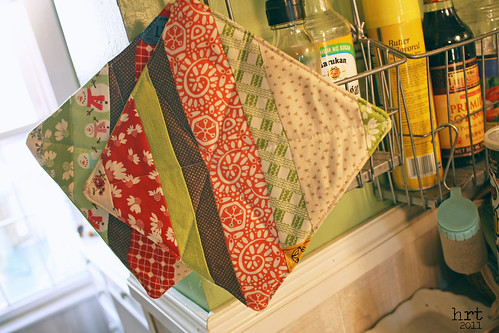
I also made some string block hot pads. I like the scrappy look of them, hopefully their new owners will enjoy them as well! I hope that you all had wonderful holidays - and perhaps there is still some holiday merriment in your near future)

** perhaps an important note: this wreath is just for my personal enjoyment, it's never proper etiquette to copy someone else's ideas and then sell them :)

Wednesday, January 19, 2011

framed...

Continuing on with the parade of Christmas gifts, I made these for the moms - my mom and Derrick's mom. I have really gotten into anything with an adorable little face recently. Kawaii is a Japanese word that means cute - and those little smiles and big eyes certainly are cute! I love this line on the wikipedia page: "In some Asian and western cultures, the Japanese word for cute (kawaii) has joined a number of other Japanese words borrowed by overseas Japanophiles." The term 'Japanophiles' makes kawaii seem like some disease or jailable offense.

I bought some cotton tea towels by Paperchase at Borders that inspired this project. [These towels will never see a dish - I picked them up purely for the fabric :] I continue to stretch my top stitching muscles; I'm so glad that the sketchy look is in.

I have been getting my fill of paper piecing lately [still working on my New York beauty quilt]. This scene is collage of a couple different patterns found in the book Down In the Valley [a REALLY great source of paper pieced templates!] Derrick's mom's style is primitive, so I coffee stained it and baked it in the oven to give it a more distressed look.

I love how the red border gives it the look of being matted - completely coincidental, the finished piece was a little too small when it was completed.

Another little perfect-for-the-holidays project I made was this little headband. I am over the moon for all those little hair flowers that are popping up everywhere. This fascinator was easy enough - a purchased head band, some faux flowers, a feather, glitter, and a couple of buttons. I arranged and hot glued them onto an oval of wool felt. Great [simple!] accessory for a fancy dress party.

Saturday, January 9, 2010

there's those wise guys...

Did you know that the wise men finally arrived? January 6th [twelve days after Christmas] is considered old Christmas or Epiphany. Biblically the wise men didn't make it to Bethlehem for some time after Jesus birthday. Old Christmas marks this occasion. I thought that this week would be a time to show off my sweet nativity set. Love it...

The set clearly has a modern, clean look - but I do love the very stylistically different manger! [yep, I picked that baby up at a thrift store :] Derrick is still unsure that the figures 'match' the stable.

Love it...

Thursday, January 7, 2010

yummy in my tummy...

This year’s all-gals Christmas party was a hit – Jordan and I served up a yummy dinner. I love these little muffins/biscuits. They are made using a slightly altered version of a recipe in the Kitchen Aid cookbook that came with my stand mixer. Thought I’d share…

Cheddar Herb Muffins
Yields: 24 mini muffins or 12 regular muffins

• 1 C buttermilk

• 1/3 C butter

• 2 eggs
• 2 C flour

• 1 C shredded cheddar cheese
• 1 Tbsp sugar
• 2 tsp baking powder
• 1 tsp parsley

• 1 tsp oregano
• 1 tsp thyme
• ½ tsp baking soda
• ¼ tsp salt
• ¼ tsp black pepper
→ Place buttermilk, butter, and eggs in mixer bowl. Mix on medium speed for one minute. Stop and scrape bowl. Combine flour, cheese, sugar, baking powder, herbs, baking soda, salt, and pepper. Turn to low speed and add flour mixture, mixing just until moistened, about 30 seconds. Be careful not to overbeat.
→ Fill greased muffin pans 2/3 full. Bake at 400F for 15-20 minutes. Serve warm.

yum.

Saturday, January 2, 2010

shiny new year...

Where-oh-where has 2009 gone? It is strange to think that we are already on day #2 of 2010. I hope that last year brought you many blessings and this year brings much hope! I have several new things to post soon [2010 looks like it's going to be a busy year]

Haven't had enough Rankin and Bass stop motion this holiday season?! Check out the classic Rudolph's Shiny New Year [youtube link] Gosh I love these classics!


Monday, December 28, 2009

little christmas elf...

Here she is - the newest woodland elf: Serenity! I loved making this little hat for her - I think it's the bees knees. The hat is from the book bend-the-rules Sewing - it combines some of my favorite elements: quick, easy, and so darn cute.

Initially, as a 100% wool purest, I had my doubts about wool felt. While I still won't be making any heirloom pieces with it, I have grown quite fond of the material. It's great when you need something sturdy without the aid of a stabilizer or interfacing. I was excited about how well the flower turned out. It's one of my few attempts at machine applique (I'm a hand stitcher) and I made the wee pom-pom in the center.

ahem... yesss... it is a little big for miss Serenity's head - but hey, the only model I had was Sophie :) She looks pretty swell in it too!

You'll have to excuse all of the camera shake. I really don't like to use the flash (it just looks too harsh even with some photoshop help).

Saturday, December 26, 2009

christmas in the kitchen...

At our house the holiday decorations stick around until at LEAST New Year's Day. I think if we can start listening to Christmas music on November 25th, we can keep listening and looking at pretty ornaments beyond Christmas day. This past summer Derrick and I put up some shelves in the kitchen. The boards are from an old barn we tore down at my grandma's farm before the auction. I painted them with a light coat of white paint and we put them over an antique cupboard - we call it our hutch. (this is where our little village of houses is this year)

I l.o.v.e. my feather tree and snow-head ornaments! The gingerbread guy was a wonderful handmade ornament from Marlene - I see him alot during the day as he is right next to the cookies :)

Wednesday, December 23, 2009

up on the roof top...

Looks like no snow again today, I am still hoping against hope for a white Christmas and NOT the rainy-green one that is predicted. Oh well, the inside of the house is still lookin' pretty cheery. Last year Derrick and I started making these little 'putz' houses. The history of putz houses is really neat, I'll leave explaining it to the experts.

We like working on them - he is the architect, tracing the house outlines and wielding an exacto knife, and I am the decorator adding all the little embellishments and glitter. They are incredibly time consuming for such a little house. This year I put them on our 'hutch' (well, it's a cupboard with shelves above it, kinda like a hutch).


Looking through the window of this house, you can see a picture of my mom as a little girl sitting next to their tree with a Christmas village nestled underneath.


My little hand-dyed trees worked out beautifully! I use vellum for the windows - I think it lets the perfect amount of light through.


This year we made time to put together three houses - two for others and one to add to our little collection. (the one in the picture above lives with us now :)

"A merry Christmas to all, and to all a good night..."

Tuesday, December 22, 2009

the dog ate my christmas tree...

Well, fortunately she wasn't able to devour the entire tree. We thought we would be really tricky and only put vintage plastic bulbs on the lowest branches... all except for one gold bulb apparently. Which coincidentally happens to be the one Sophia knocked off the tree. Seeing the sparkle and shine of a ball falling through the air, she had no choice but to attack it, and crack went the Christmas bulb. Luckily, no glass shards were ingested (phew!) I should mention this was in the middle of our dinner service at last nights Christmas party. Never a dull moment...

So here are a few more snaps of our tree since yesterday I talked about our tree but didn't get around to showing it to you.

Here is a close-up of my improvised tree topper. I've noticed that the latest trend is to have greens sprouting out of the top of your tree - and I love the look. So I took some shiny, glittery stems that complimented the ornaments and wired them to the top bough. Then I covered the top 'branch' with one of the vintage bulbs (I just took the hanger part off). I think it's fun.

See that snazzy gold bulb at the bottom? Rest in peace little gold bulb...
Hope your holiday decorating is going great - only a few days left!

I'll leave you with a special holiday treat from Late Night with Conan. (yes. I do realize that this clip is not remotely related to anything crafty. You never know, a good laugh could give you energy to go and finish those last handmade gifts.)

Monday, December 21, 2009

beginning to look alot like christmas...

Okay, so it isn't an original title for a blog post this time of year - but it is very appropriate. With a week left, we finally got our decorations out and our Christmas tree put up. Who knew all it would take is a little snow to get me in the holiday spirit?! This week I hope to show you a little peek into our home in all of it's winter glory.

Sunday night we put the tree up. Normally our little tiny Charlie Brown-ish tree is plastered with all of our childhood ornaments. This year (especially since we were so late) we went simple; just using vintage bulbs. They're a mixed lot of my grandma's bulbs and thrift store finds.

One of the boxes we opened had no metal hooks - so we improvised with some wire. (note: this paddle wire is perfect for crafting hooks, if you snip the wire in the center of the flat sides, the bends in the wire are perfect for making a loop on each end)

I'm off for a busy day of prepping for our Christmas party tonight (and watching the snow out the window :)

Friday, December 18, 2009

they're available...

Added a few last minute holiday items to ye olde etsy shoppe...

pink & blue hand-dyed trees


4" & 5" plain trees (ready for you to hand-dye them :)

springy snowman

Wednesday, December 16, 2009

is it snowing in here or is it just me...

Shhh... don't tell, but this little guy might end up being someone's Christmas gift! The inspiration for this project came from the rusty spring. When we cleaned out my grandma's farm for the auction there was a HUGE pile of scrap metal (which actually was one of the more profitable items at the auction - who knew?!) Amongst the rubble were a bunch of old bed springs. I knew I had to do something with them, I just wasn't sure what. This snowman is a compiliation of a pattern I saw for a much smaller snowman head and my own creativity. I think he turned out pretty swell.

He is mostly made of muslin that is painted after sewing (his head, hat, and holly leaves). His nose is a painted 'twistie pod' - and no, I'm not exactly sure what a twistie pod is except to say that it is some kind of natural element that is intended for snowman noses. I love his scarf - a coveted piece of Westfalenstoffe fabric that has been in my stash for quite some time.

My most favorite part is the little red bird - he started life out as one of those pink-flocked-1970s-wedding birds. I pulled out his wings and tail feathers (ouch) and painted him red, then I painted his wings with tacky glue and sprinkled some chunky vintage glitter on. He's too cute!

I would love to hear some more ideas on projects to use up my nostalgic rusty spring collection - what do you think?

note: I made this snowman a friend - they didn't get along too well, so he's looking for a new home. He'll be in my etsy shop soon!

Friday, December 11, 2009

secret santa...

My secret Santa gift is on its way to a warmer climate! This is the first time I have been involved in an online exchange - it's been great so far! I was inspired by the season, so I went with fat quarters and fat eighths in reds and greens - the red one is one of my favorites, I used it for a half apron and it turned out lovely.

I made these little ice skating snowmen. You may be thinking 'pipecleaners, really?' I know they can be a little 1989-Family Circle-magazine-crafty, but I love kitschy Christmas decorations. The other day at the thrift store I scored some sweet felt clip on birds for the tree (you know the kind with the glitter :) Hope my exchange partner enjoys her gift!

Today I got a little yellow tag in my post office box - that (generally) can only mean good things. And it was a good thing... a REALLY good thing! My secret Santa gift from Dana arrived! I felt so honored THE Dana of the Old Red Barn Company and quilt along fame was my partner (that's just pretty cool in my opinion). The fabrics are lovely and the package smelled super (she included one of her own chestnuts and brown sugar soaps).

Oh, and maybe you wanted to know who will be adding a little tree to their Christmas decor?! My sweetest friend Jordan picked #7 (she wasn't sure why I was asking her to pick a number, but she was glad to help me out :)

#7 had this humorous comment:
"You know, it really is difficult to decide which color is best (truly, you should sell them in little multi-color groves). My vote is for blue because blue is new to the Christmas scene. Red and green are expected, but blue says "I'm here to stay, green. Pack your branches, red." Know what I mean?? "

So a little tree will be on its way to Duff, who, judging by her blog, wins everything! Thanks for all of the nice notes - I enjoyed reading all of them!


p.s. Lynn, the pillow is making it's way to you, sent it priority mail on Wednesday...

Wednesday, December 9, 2009

g-i-v-e away...

Last call for the little tree giveaway... I'm drawing a winner tomorrow (edit: the winner will be drawn around midnight Thursday nite, feel free to enter all through Thursday!). Leave a comment on the last post. Best of luck...

The hubby is out with some guys, so maybe I will sneak away to the craft room!

Tuesday, December 8, 2009

going green... err blue or pink...

It's the holiday season isn't it? After hosting my very first giveaway, I'm hooked! It was so fun to hear from all of you and to share something that I put together with my own two hands. So, who wants a free tree? Yup, I'm giving away one of my hand dyed trees (see this post if you're not sure what I'm talking about).

Leave me a comment and let me know what color tree you like best. I'll let you know the winner on Friday - that means you have through Thursday to enter. Best wishes and Merry Christmas; I'm off to pack up Lynn's pillow and my secret Santa gift for shipping tomorrow.


p.s. this giveaway is partly because of the MANY wonderful comments I had on the trees; thanks for your kindness :)

Wednesday, November 25, 2009

o christmas tree...

Nothing says kitchy-vintage Christmas like a pink bottle brush tree! I recently decided to deck out the house using bunches of these little trees. A couple of thrift stores and an antique mall later, I realized that my dream of finding vintage trees was not going to come true. I looked online and favorited a few on etsy, bid on one on ebay... my thirst for little trees was not satisfied. Then it happened, I found a tutorial for dying your own trees! A quick trip to Pat Catans and I was home with nearly 75 trees of all sizes (up to 5" of course).

It is really a pretty easy process: remove the wooden bases from the trees, let sit in a bleach & water bath. RINSE WELL. Dip in dye (I just used Rit powder dyes - you only need a little dye and a very short dip to get LOTS of color!)

These trees are made by limiting the amount of time you leave your little green trees in the bleach bath. I think it really gives them a vintage flavor, it's as if they have been around so long they faded. It might be neat to try a bleach bath after dying.

These trees are just bleached - no dye needed for some frosty white trees!

We thought that the pink ones almost looked like candy!

I may have some of these up on my etsy soon... check back :)
ALSO: I will be participating in Sew, Mama, Sew's Giveaway Day - so stay tuned!