
There are ALOT of ideas out there on how to make labels or where to buy labels [I'll add a few links at the end of this post]. The web is getting way too crafty :] Here are a few samples I came up with recently along with brief how-to's for each one:
Label #1: inkjet fabric
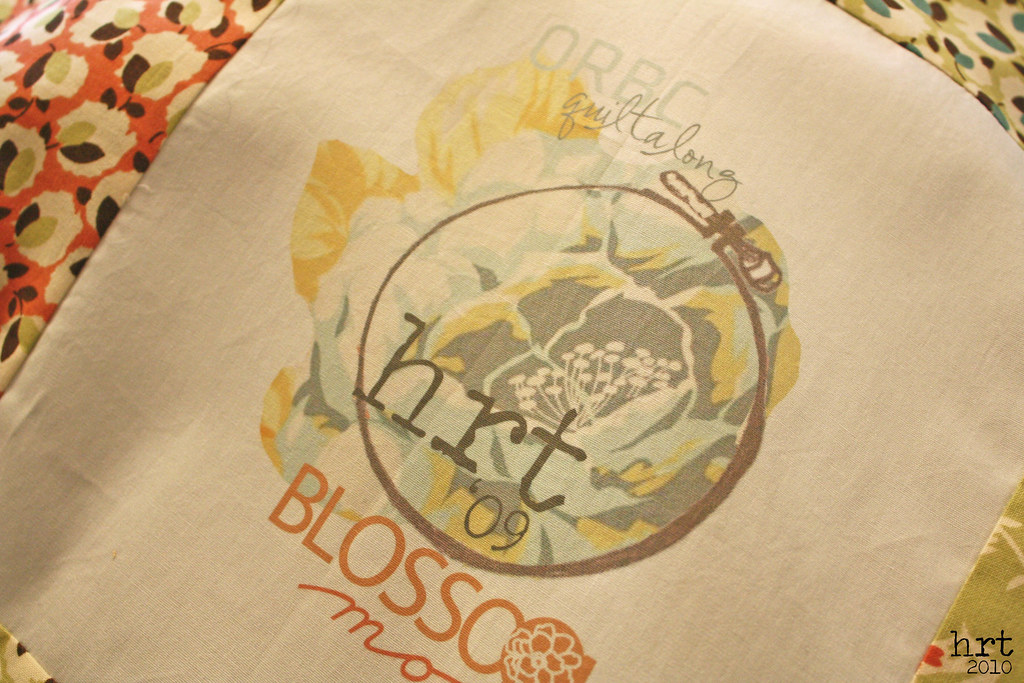 This label is for my ORBC quilt back. I love the way it turned out. I am an unabashed photoshop fan - this project was no exception.
 1. To make the label, I went online and got the fabric card [pdf file with all of the fabrics] for the Moda Blossom line.
2. I opened the pdf file in photoshop and copied and pasted the design elements that I liked in the fabric card into a new document. I have a tablet and that made it super easy to 'cut out' the flower and such.
3. I added my initials, the date, and other info to the label.
4. Print onto inkjet fabric. [I got a roll of it at JoAnn Fabrics; it's great, you can cut it to any size you want! The link is to the product I used, couldn't find it on JoAnn's site]
5. Follow the fabric instructions: for mine, that meant letting the ink set for 15 minutes, removing the paper, and then rinse with cool water.
Voila, you're a fabric designer! I did a sample and put it through the washer and dryer, the color stayed with no noticeable fading.
Label #2: twill tape tags
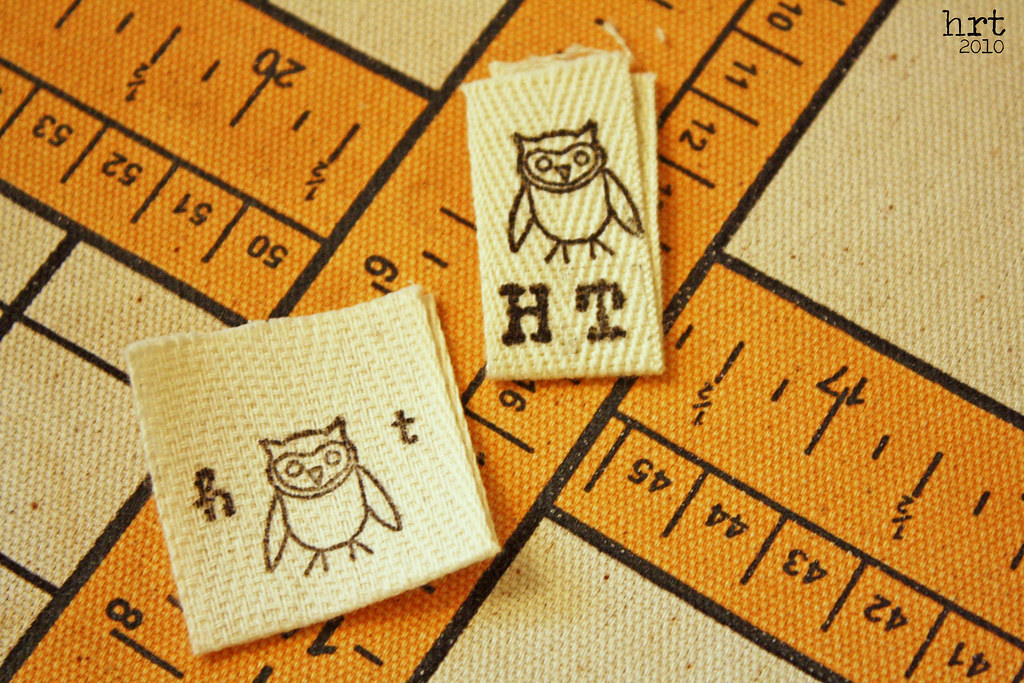 Super simple to make: I bought a couple of sizes of twill tape [or rug binding], picked out some stamps, and, most importantly, purchased a fabric stamp pad.
 1. Cut twill tape to desired length; fold in half.
2. Stamp, stamp, stamp
3. Heat set on high [I used steam]
Label #3: stamped fabric
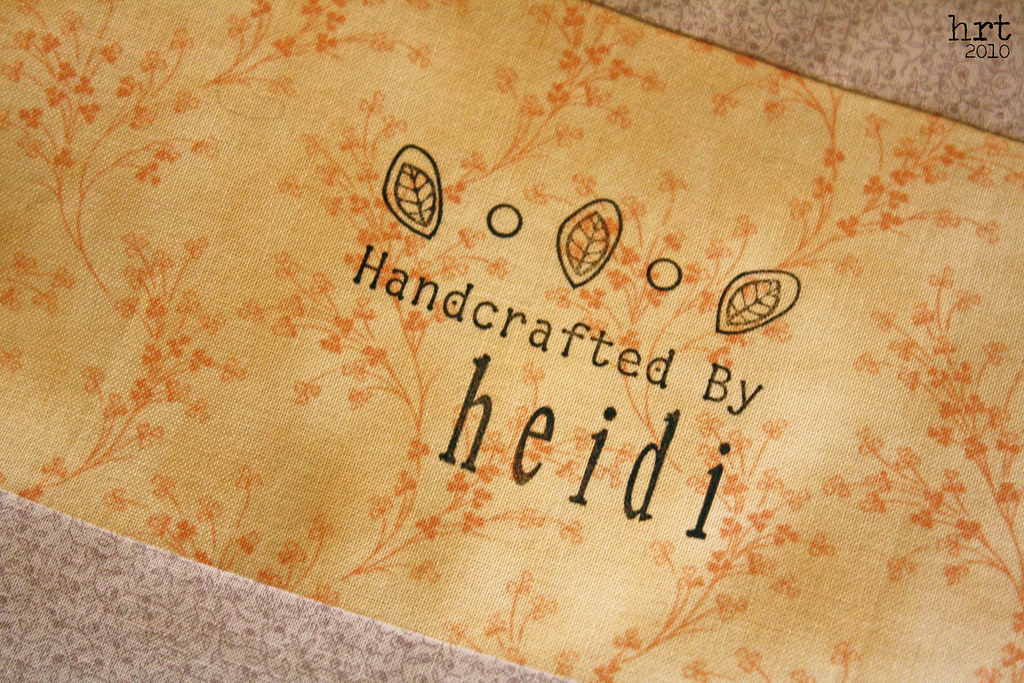 Okay, enough with the steps: stamp on your fabric using the fabric ink, heat set.
 Here are some other resources for labeling your quilts:
Iron-On Transfer Tags
Custom Manufactured Labels
Fabric Paint Stamp Pad [note: this is a great method for larger stamps, not so great for stamps with small, fine details]
Do you label your projects? How do you do it?


One of my favorite things about making quilts is the thought that one day my great great (great?) grandkids could be wrapped up in them one day. Like a small piece of me that will live on. I've never made a label before, but I love all your suggestions. Did you have a custom stamp made for your name, or did you use an alphabet set?
ReplyDeleteWow! I never knew this was possible to do at home. Thanks for the great tips & links!
ReplyDeleteI do the twill tape thing!
ReplyDeleteThanks for these neat ideas! I have been wanting to start with a little label and the twill tape thing seems perfect. I'm so glad you shared your ideas :)
ReplyDeleteLove the labels...thanks so much for telling us about all these wonderful options....and the importance of labeling! I have been bad about that!!
ReplyDeleteGREAT suggestions! Thanks for sharing!
ReplyDelete