
 Are you up for the challenge? Ready to put your paper piecing hat on? Let's take on some New York Beauty blocks! In this post I will share some links and tips to get you started [and announce the fabric winner!] Perhaps the most important tip I can share is: just go for it! Don't be intimidated by paper piecing or curved piecing [like animals, I think they can smell fear :] It may take a little practice, but I am confidant that if I can make these blocks, so can you.
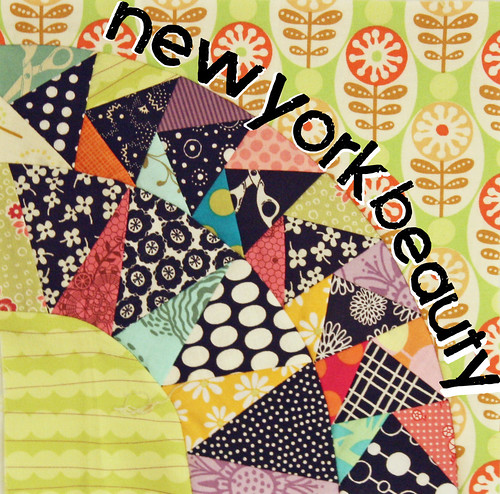
 First the patterns. There are books and free piecing patterns all over the place. The patterns that I used came from Ulas Quiltpage. [a note: some of them I slightly adapted/changed] These are great and fairly simple designs. If you check the pic above, you can see that I used a variety of patterns. If you are looking for something a little more complex, check out these patterns over - they are not necessarily more difficult, but many have multiple paper pieced sections. [the block at the top of this post is from those patterns.
Component 1: Paper Piecing
Once you understand the basics of how to paper piece - the sky is the limit. I recommend heading over to the Quilter's Cache. They offer great step by step instructions and diagrams to help you get the hang of it.
The biggest issue that I have with paper piecing is choosing the right size fabric. My recommendation: go big. Yes, it is a little wasteful, but choosing a bigger scrap and trimming the excess makes the process go much smoother. As you make your blocks and gain experience, you will become a better judge of what size piece you need.
Another tip - when you trim the paper pieced section, check your template/pattern and make sure that it has a 1/4" seam allowance on the outer edge of the section. Otherwise, when you sew the block together, all of your precious little points will be cut off! And that is part of the beauty of paper piecing - it is so much easier to get all those perfect little points using this method than traditional piecing.
Component 2: Curved Piecing
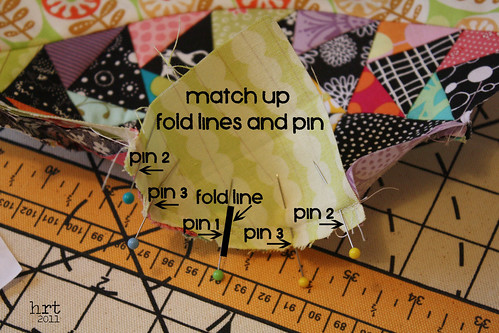
After paper piecing, the solid sections remain. To make sure that the sections line up perfectly, I fold each of the two sections I am going to sew together in half, making a crease. Then I match up the creases [with the sections right sides together] and pin. Then I pin the two ends, then pin toward the center.
 Once the two sections are sewn together, notch along the seam allowance. Then press the seam allowance toward the solid section.
I would love to see any nyb blocks that you whip up! And now for the winner [drumrooolllll, please]: Cathy Tomm! I sent you an email! Just a note: Cathy was not my first random winner, the first person was a no-reply blogger and left me no way to contact them. Thanks everyone who played along - I enjoyed reading and responding to everyone's lovely comments :)


wow I won. I was surprised to open my email and get the notice. I have never won one of these blog give a ways. I love black and white fabric so they will go to good use. I sent you my address. Thank You so much.
ReplyDelete