skip to main |
skip to sidebar
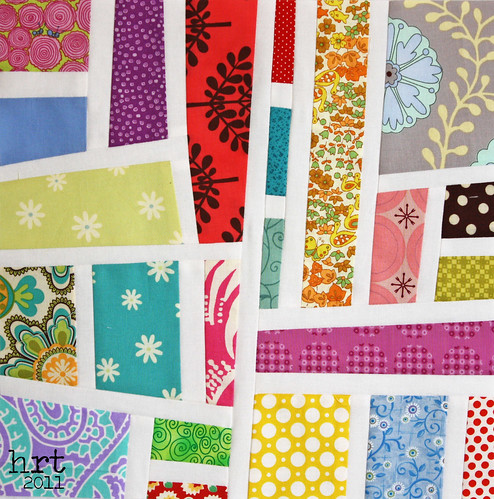
 I sew and blog as a hobby... you know something that you do voluntarily, something with limited outside pressure or force... So sometimes, I get behind on my blogging and I have to force myself to be okay with that. No one will die, my income will not be affected - in short, no major tragedies are happening because I disappear off of the interweb for a time. And though I have not been posting, I have been lurking around some inspirational blogs and continuing to craft.Keeping up with the Nittany Block Party has been going well. In March, Dena asked us to make mod mosaics using the Oh, Fransson tutorial. I really love this finished product and enjoyed the process to boot. Yes, there is a tinge of surprise in that statement. I was hesitant to dive in, but now want to start a quilt of my own using this technique. Oh the options - scrappy, coordinated, color wheel style, all of one line... I think they all have their particular appeal.
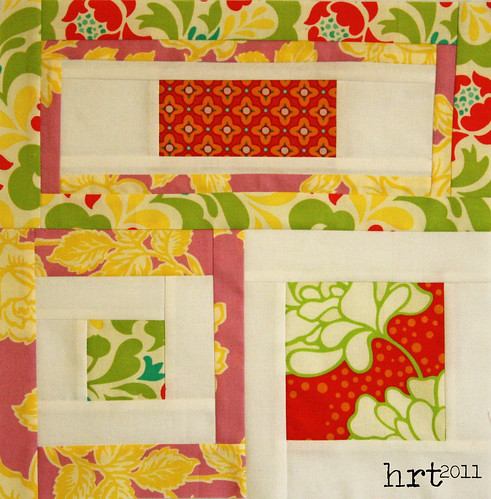
 In February we made improv style rectangular and square blocks for Rachel.
 I also wanted to share with you the final installment of blocks for the Blogger's Block-A-Palooza quilt along. Are you impressed that I had all of my blocks completed in a timely manner? [even before finishing instructions were posted!] In fact - these blocks are now in a completed quilt top that I finished two Sundays ago! [if you want to see these blocks a litle closer, click on the image to head on over to my flickr]I also have another top completed using an Odyssea charm pack and am putting the binding on a baby quilt made with a Lovely charm pack. So, no sewing slacker here [just a posting slacker :]Last week was spring break around here... spring break with snow accumulation doesn't seem very springy to me. [this unfortunate weather is, by the way, why my pictures on this post are so muddy :[ Here's to hoping for sunshine [SOON]!
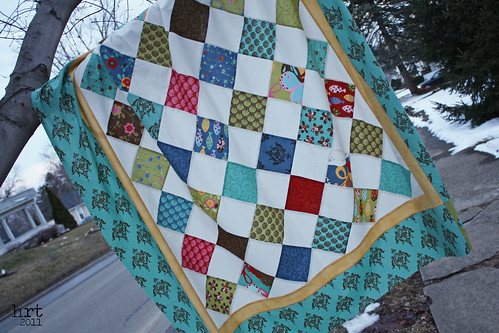
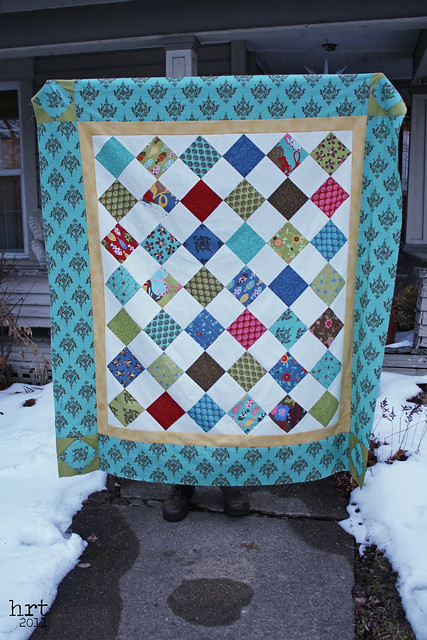
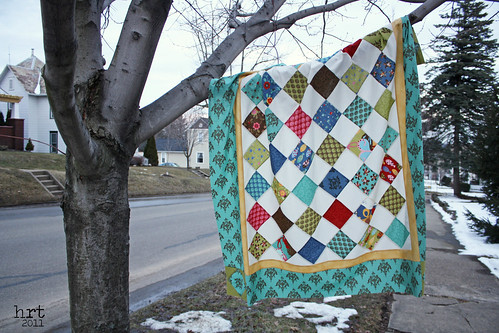
 Many moons ago, in a place not so far away was a land of dolphins, and seals, and penguins, and killer whales. Amongst the plethora of now-defunct businesses in Ohio lies Sea World Aurora. One of my fondest childhood memories is an elementary field trip to Sea World that my mom and grandma came along to chaperon. From that trip I have 1) memories and 2) a Shamu made from really stinky plastic. One of the attractions I remember was pearl diving - divers are in a giant clear tank and you watch them swim to the bottom and emerge with a pearl. And that, my friends, was the catalyst in the naming process for my latest quilt finish: diving for diamonds.
 This is my first 'on-point' quilt. It was really not all that complicated, I just needed to do some math and figuring before I started out - and thank goodness for a design wall to help me lay it all out before sewing! On-point just helps a quilt to shine, next time you are over on flickr take a look at how many quilts are posed in close-up pictures to look as though they are on point. Point envy, perhaps :)
 A confession: I accidentally bought backing fabric twice, so the quilt got a border and a considerable boost in size. I am CONSIDERING quilting this myself [eek, I'm scared!] A few more practices with my darning foot, and I think I might be ready! My quilting templates are already drawn up for the borders :)
 Want to know a little more about what happened to Sea World Ohio? There are details here and here.
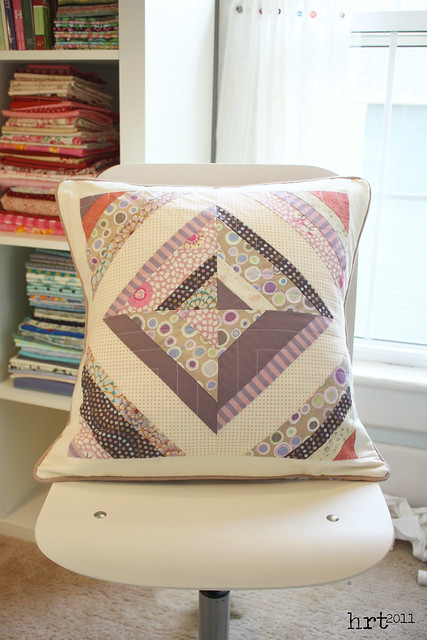
 Though quilting hasn't even started, these pillows are ready to match the hemispheres quilt that I finished a few months ago. The plan is to use this quilt to freshen up the living room, and the pillows will be the finishing touch. It is always a struggle to figure out what to do with all of the leftover bits and bobs from a project - scraps, extra blocks, additional yardage. There is always a part of me that wants to keep all of these together, I'm not sure why, suppose it is 'just in case' I need to make something else to match. This is why I especially like to use as many of those extras up, and these pillows did just that.
 My first crack at string blocks was last year in the Block Swap 2. The technique is super simple using a paper pieced method. I enjoyed playing around with machine quilting on these blocks. It's so neat how you get unintended patterns when you quilt - in my head I only saw the quarter square corners and not the overall cross pattern that appears.
 Leftover circles made this pillow a snap to put together. This is my first attempt with a darning foot - I am not sure that it is perfection, but it really wasn't as scary as I thought! Practice will make perfect I'm sure. I actually made two of these, the other one is up in my etsy shop if you love it too ;)
 The backing finishes off the remaining stash of my fave fabric from the hemisphere quilt. Sad to see it go, but glad I was able to use it in a larger piece. The piping [and other half of the backing] is a cotton linen that I had and happened to coordinate PERFECTLY! I have enough of this fabric to bind my quilt with - yay for using what I have!I'm excited to see a little bit of blue appearing in the sky, though something about this weather and time change has given me the worst headache :( Perhaps some crafting and netflix will be the cure!
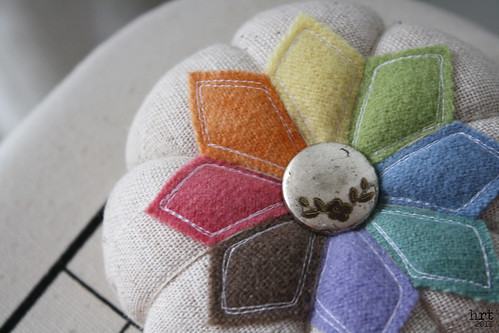
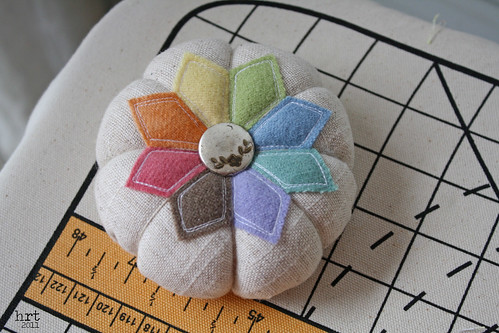
 Another VERY exciting round of the Scrappy Pincushion Swap is coming to a close. All of the wonderful swaps over on flickr make me a little nervous - the standards are pretty high, and of course, you don't want to disappoint your partner. From the looks of my partners mosaic, (s)he is into color wheels, modern designers, linen, stars... which leaves loads of possibilities! I chose to run with a sort-of homage to a Dresden plate. Some lovely 100% wool bits are top stitched onto a natural colored cotton linen. [many of the wools are hand dyed, which I love!]
 Originally I had planned to put the cushion inside of a zinc lid, but it just didn't look right. Instead I hand sewed a wool circle on the bottom to cover the stuffing opening and to give it a nice flat bottom. It was difficult to package it up and send it off, I really like how it turned out and wouldn't mind having it sit next to my sewing machine :) All there is to do now is hope that my partner likes it as much as I do!
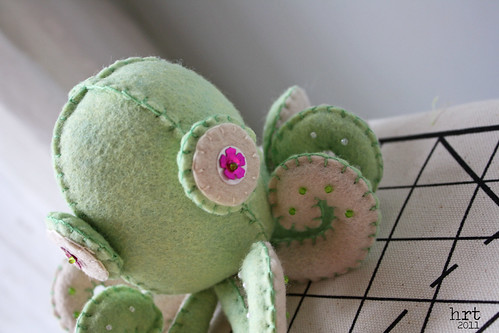
 Enough about the pincushion I made, on to the AMAZING one I received! A current obsession is anything and everything aquatic, and my partner did not disappoint. This little octopus is practically perfect in every way. [a bit o' Mary Poppins there]
 Adrienne really outdid herself on this one, she used wool felt and stuffed him with cleaned and carded wool from local sheep. The tutorial for him is over at futuregirl.com I don't know that I can stand to stab him with pins, but he will make a lovely addition to my crafty space!I continue to work on my QAL blocks, though life has certainly picked up the pace and slowed down my progress. Here is to hoping that there will be more sewing and crafting time in the near future!
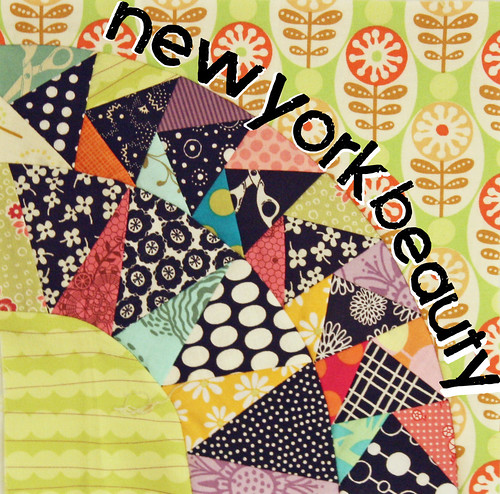
 Are you up for the challenge? Ready to put your paper piecing hat on? Let's take on some New York Beauty blocks! In this post I will share some links and tips to get you started [and announce the fabric winner!] Perhaps the most important tip I can share is: just go for it! Don't be intimidated by paper piecing or curved piecing [like animals, I think they can smell fear :] It may take a little practice, but I am confidant that if I can make these blocks, so can you.
 First the patterns. There are books and free piecing patterns all over the place. The patterns that I used came from Ulas Quiltpage. [a note: some of them I slightly adapted/changed] These are great and fairly simple designs. If you check the pic above, you can see that I used a variety of patterns. If you are looking for something a little more complex, check out these patterns over - they are not necessarily more difficult, but many have multiple paper pieced sections. [the block at the top of this post is from those patterns.Component 1: Paper PiecingOnce you understand the basics of how to paper piece - the sky is the limit. I recommend heading over to the Quilter's Cache. They offer great step by step instructions and diagrams to help you get the hang of it.The biggest issue that I have with paper piecing is choosing the right size fabric. My recommendation: go big. Yes, it is a little wasteful, but choosing a bigger scrap and trimming the excess makes the process go much smoother. As you make your blocks and gain experience, you will become a better judge of what size piece you need.Another tip - when you trim the paper pieced section, check your template/pattern and make sure that it has a 1/4" seam allowance on the outer edge of the section. Otherwise, when you sew the block together, all of your precious little points will be cut off! And that is part of the beauty of paper piecing - it is so much easier to get all those perfect little points using this method than traditional piecing.
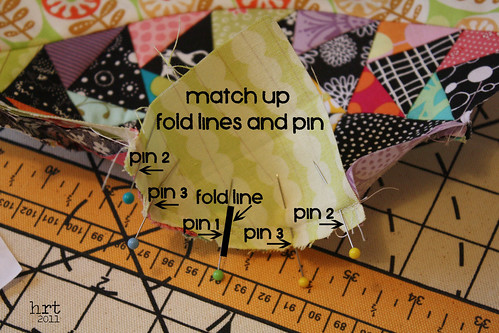
Component 2: Curved PiecingAfter paper piecing, the solid sections remain. To make sure that the sections line up perfectly, I fold each of the two sections I am going to sew together in half, making a crease. Then I match up the creases [with the sections right sides together] and pin. Then I pin the two ends, then pin toward the center. Once the two sections are sewn together, notch along the seam allowance. Then press the seam allowance toward the solid section.I would love to see any nyb blocks that you whip up! And now for the winner [drumrooolllll, please]: Cathy Tomm! I sent you an email! Just a note: Cathy was not my first random winner, the first person was a no-reply blogger and left me no way to contact them. Thanks everyone who played along - I enjoyed reading and responding to everyone's lovely comments :)

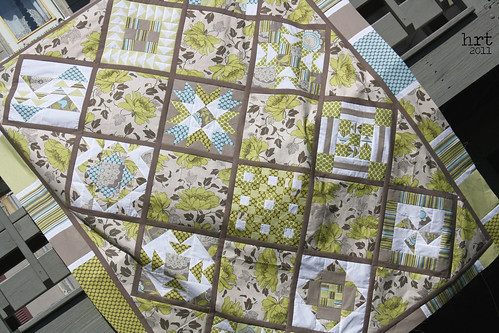 As I shared earlier - I do indeed have another quilt neatly folded and ready for the quilting to begin. [alas, I still wish I had the patience or the machine or the skill to quilt a full size...] The Bloggers' Block-A-Palooza quilt is finished!
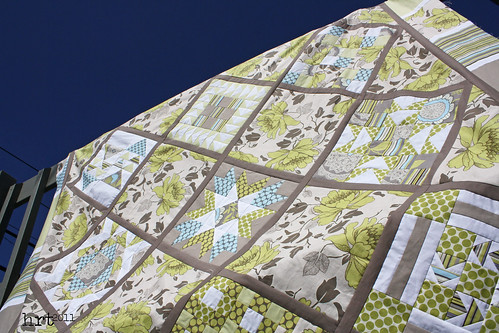 This is attempt numero 2 at on-point piecing. The basic on-point construction in my Diving for Diamonds quilt was simple enough. Upping the skill level for this quilt I attempted to add sashing. Which didn't quite turn out as I had planned [i.e. don't look too close at some of the point/intersections]. For the life of me I couldn't figure out what had to be sewn to what and in which order for those to work out - so if anyone has suggestions or a tutorial they can direct me to, I would love the help!
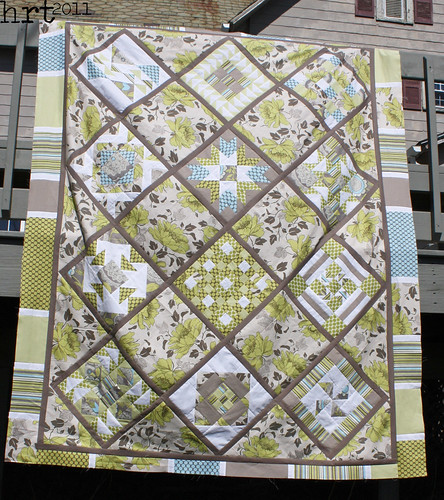 The leftover blocks I made are destined for pillows. This was a great qal - always something new to look forward to on Mondays and Thursdays! I was a little hesitant to make the cut into my Lotus stash, but I think it definitely paid off :) Well, a little dog is lovingly staring up at me asking for a food bowl refill - Have a great Wednesday!